Page Code
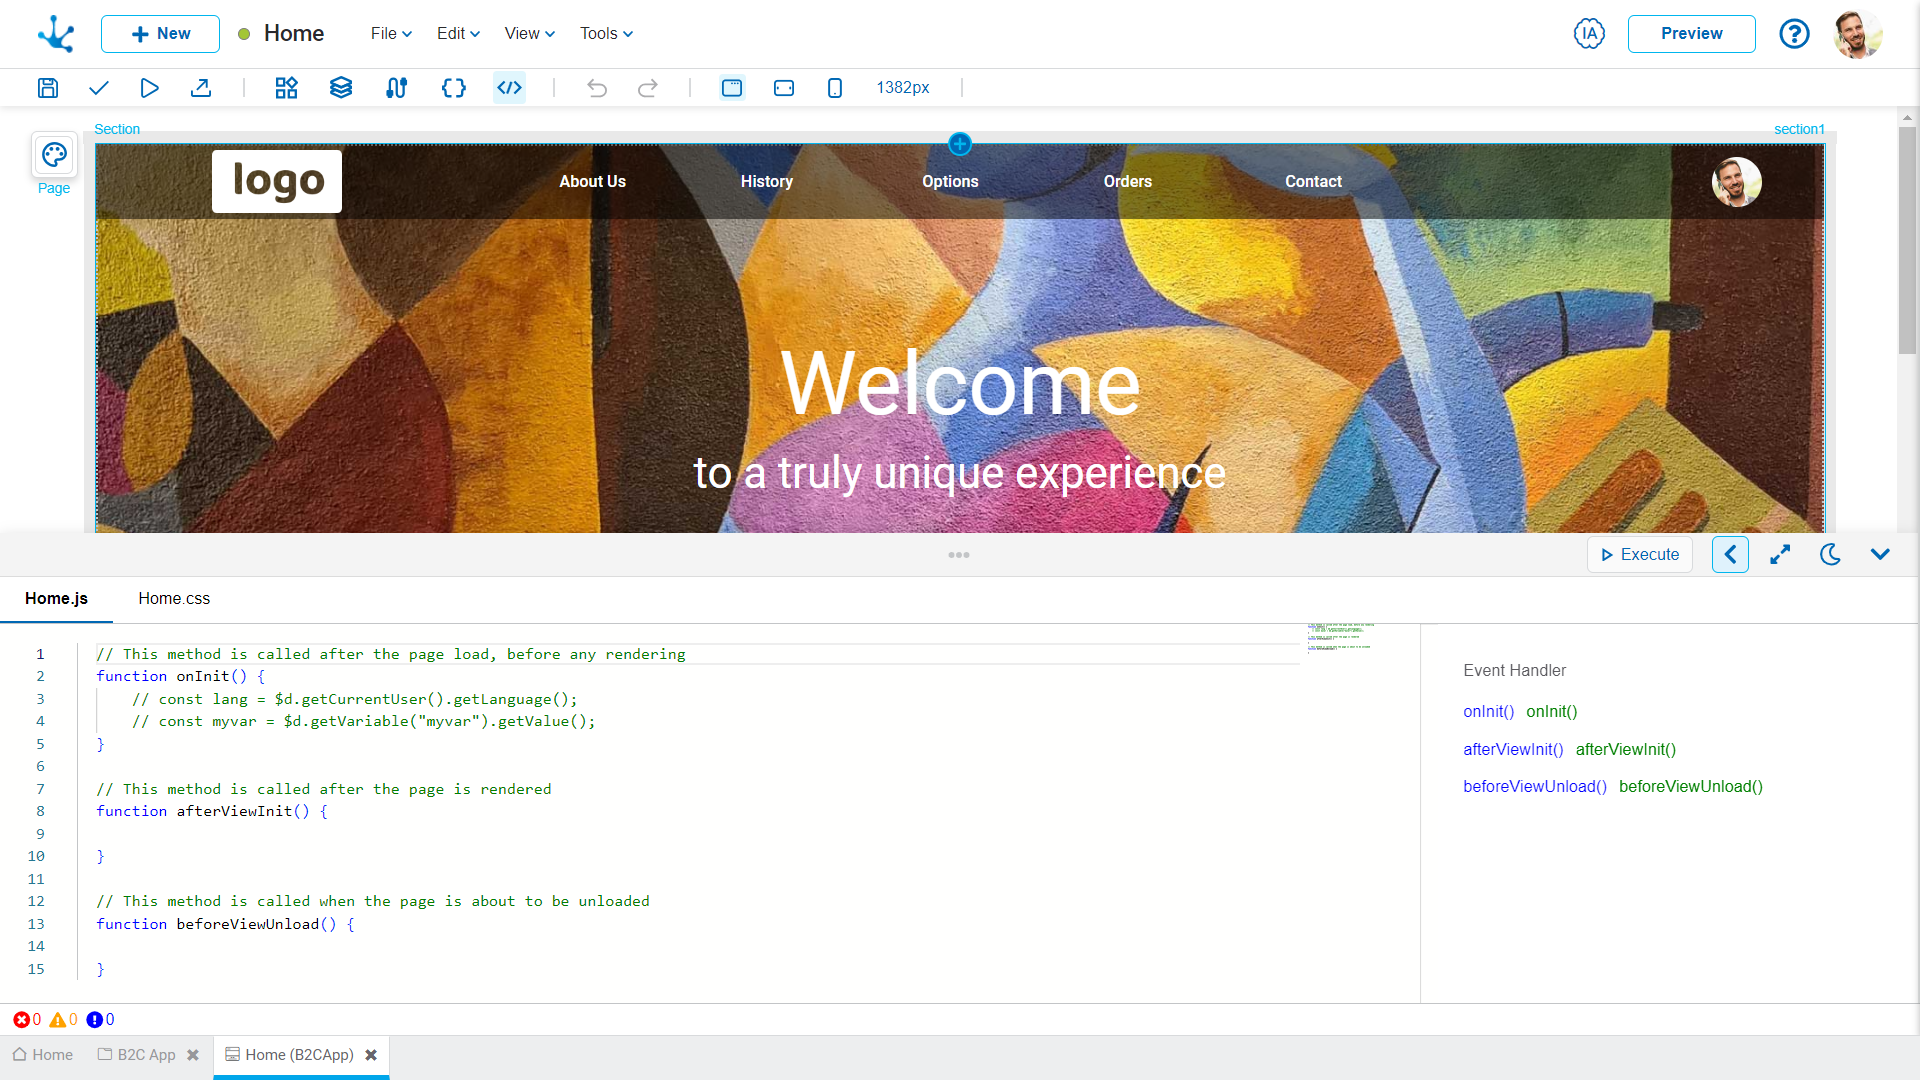
It is the area within the modeler where the functionality of the page and its elements can be extended through code.
This area contains two tabs:
ŸJavaScript Tab: It allows writing custom JavaScript functions to add interactivity to the page, dynamically handle data, manage events, and integrate with other services or scripts.
ŸCSS Tab (Cascading Style Sheets): It is used to define custom style rules that modify the appearance of the page and its elements. Here, specific styles such as colors, sizes, borders, and animations can be applied, ensuring that the design meets the project's requirements.
The code editing area is displayed at the bottom of the page, following a bar with icons. The icon  in the center of the bar allows you to modify the size of the area, while the icon
  on the far right allows to close it.
Editor Options
![]() Performs the same operation as the preview.
Performs the same operation as the preview.
 Increases the panel size and covers the page modeling area.
 Returns the panel to its previous size.
![]()
 Changes the style of the code editor to dark mode.
 Changes the style of the code editor to the previous mode.
JavaScript Tab
Each element has a list of predefined events that depend on the type of element.

Sections
•Javascript code editor of the page: It allows adding and updating functions associated with the events of elements or pages. Includes an auto-complete functionality that speeds up writing by automatically suggesting SDK functions.
•Event handler: The event handler is displayed to the right of the code editor, it contains the identifier and the list of events of the selected element. If no element is selected, the list of page events expands.
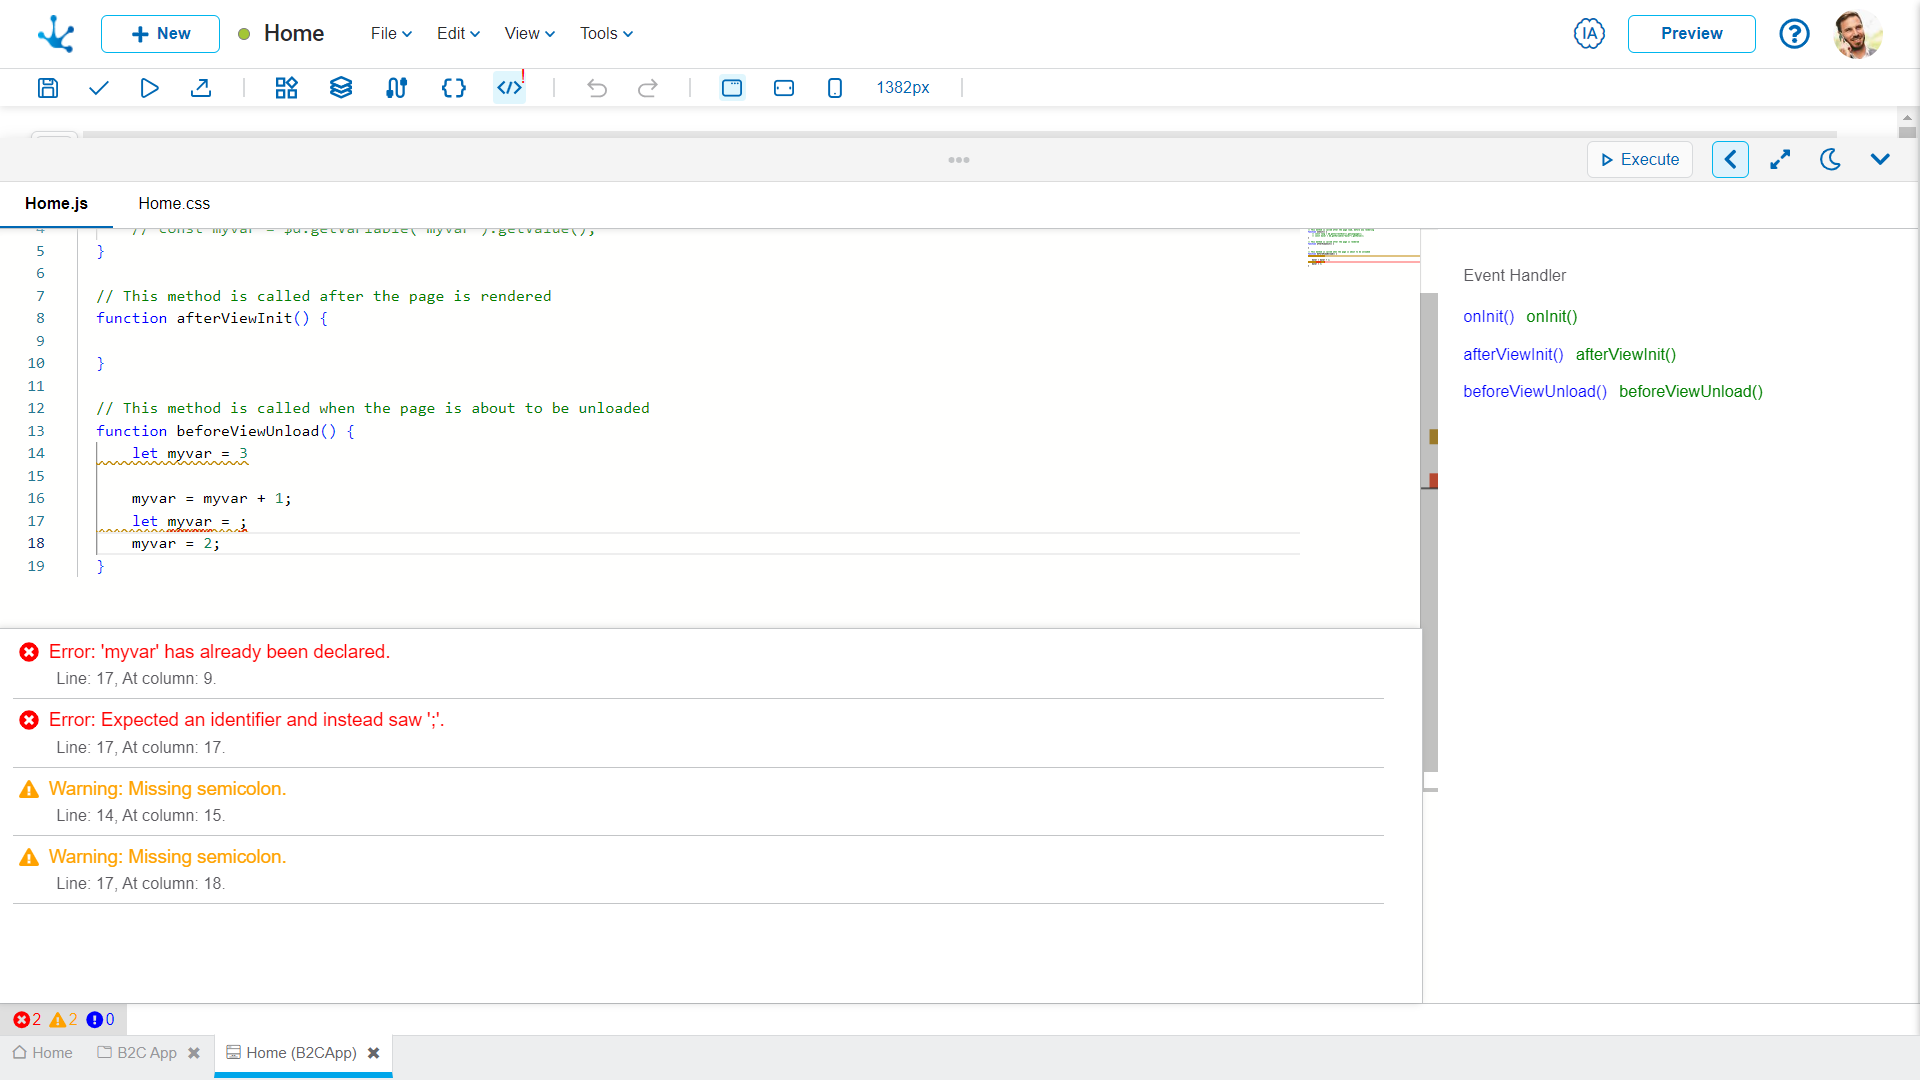
•Message monitoring console: Located below the code editor, this advanced tool makes it easy to monitor and manage messages during development.
JavaScript Function Operations
Associate
The page has predefined JavaScript functions associated with its events, unlike its elements, which do not have them.
To create and associate a JavaScript function with an event, select the event in the event handler, enabling the new function name to be entered. By default, a name is generated consisting of the element identifier concatenated with the event name. Clicking on the icon ![]() creates the JavaScript function associated with the event in the code area, and the name of the function is added to the event list.
creates the JavaScript function associated with the event in the code area, and the name of the function is added to the event list.
If the name of the JavaScript function already exists within the code, a number is automatically suffixed to the name.
Select
Selecting a JavaScript function in the event handler positions the cursor over it in the code editor.
Disassociate
To disassociate a JavaScript function from an event, click on the icon ![]() that is displayed when hovering the cursor over it in the event list. In this way, the association of the function with the event is deleted but it is not deleted from the code.
that is displayed when hovering the cursor over it in the event list. In this way, the association of the function with the event is deleted but it is not deleted from the code.
If the JavaScript function is deleted from the code area, it still appears associated with the event handler. However, the event does not execute any function and does not throw an error.
Message Monitoring Console
You can access this console by clicking on the icons corresponding to the messages, which are located in the bottom bar of the code editor.

Upon accessing the console, the messages are displayed in an organized and categorized manner. Details about each message are provided, including its location in the code and possible solutions. The messages are updated in real time, with continuous monitoring that allows you to visualize errors and warnings as they are detected.
Message Types
![]() Syntax Errors: Detects and notifies syntax errors in the code.
Syntax Errors: Detects and notifies syntax errors in the code.
![]() Warnings: Highlights potential issues that could affect the performance or quality of the code, providing alerts on aspects that may need attention or review.
Warnings: Highlights potential issues that could affect the performance or quality of the code, providing alerts on aspects that may need attention or review.
![]() Usage Information: Identifies situations in the implementation of methods and functions, offering recommendations to improve the code.
Usage Information: Identifies situations in the implementation of methods and functions, offering recommendations to improve the code.
CSS Tab
The Styles tab allows applying CSS rules to change the appearance of elements within the modeling tool.
Sections
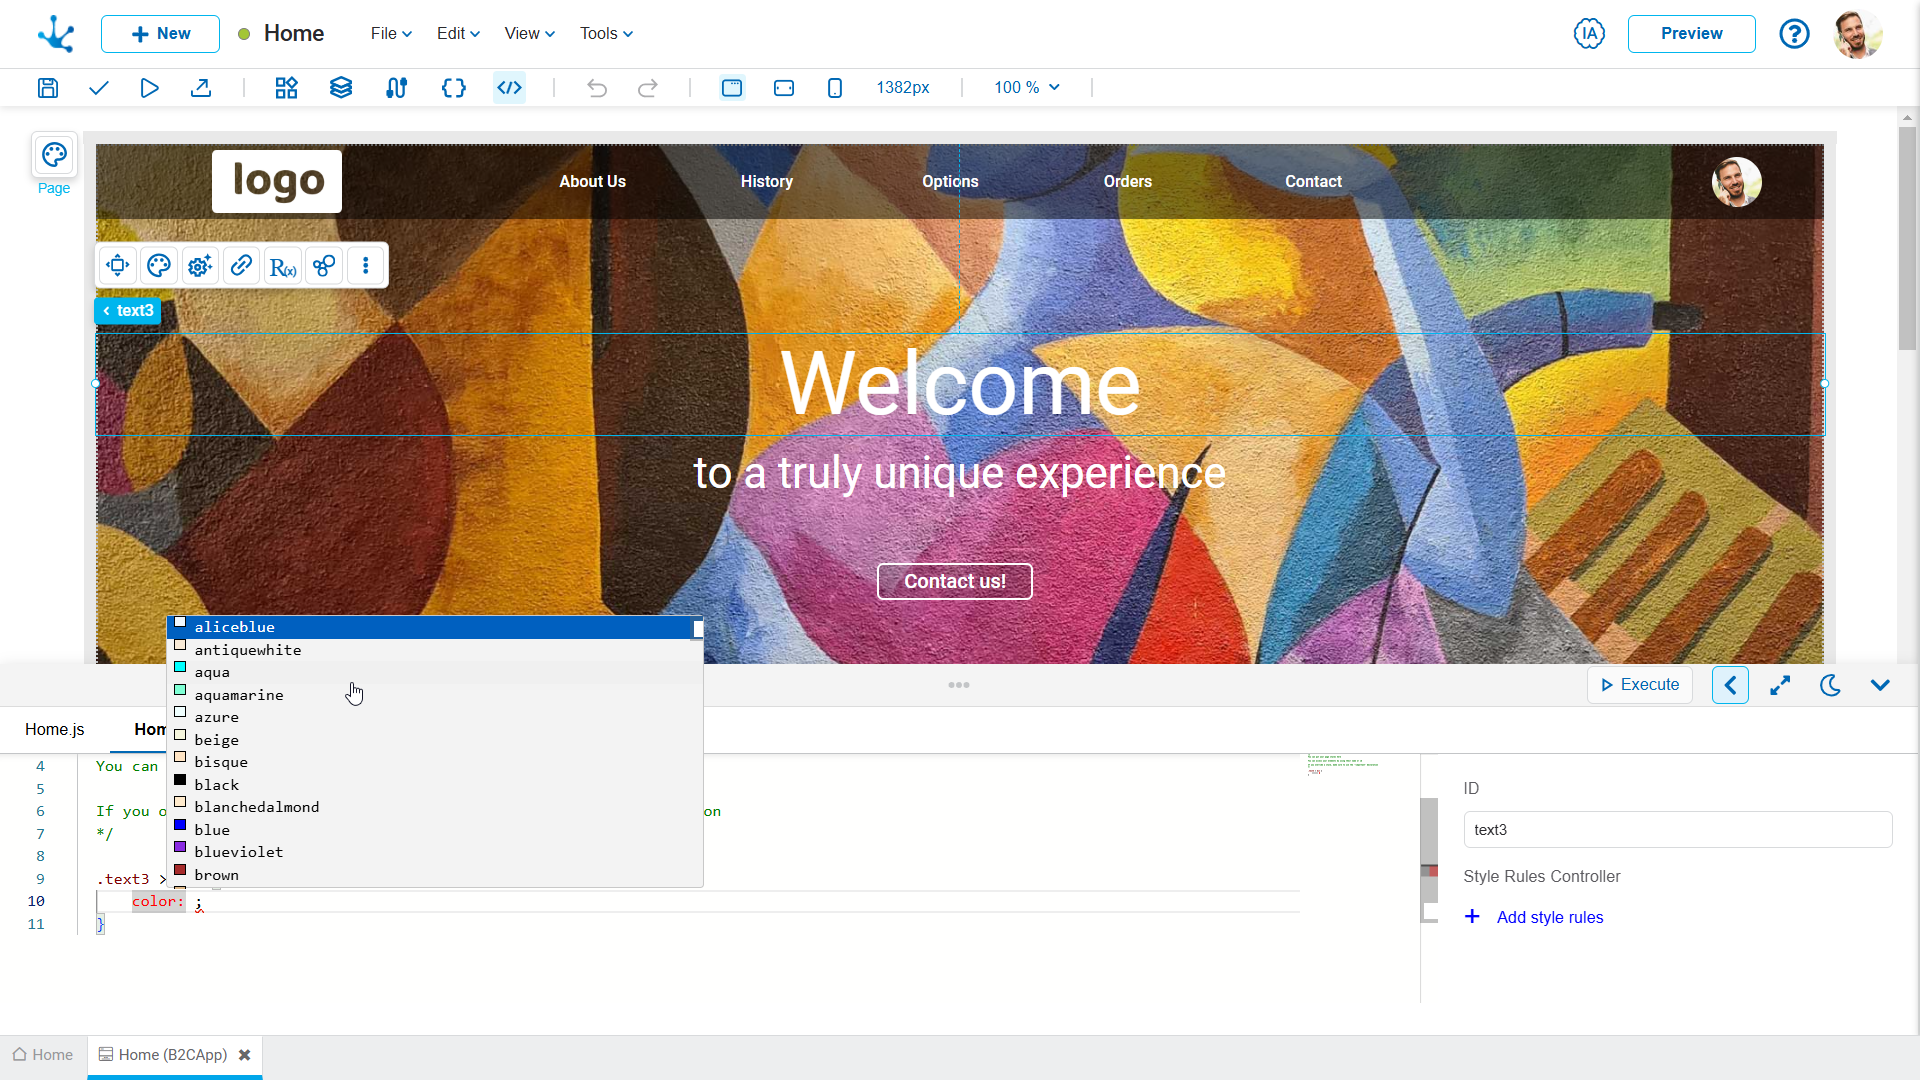
•CSS code editor: Rules can be written manually or by selecting attributes using a wizard, making it easier to configure colors, fonts, sizes, margins, and other visual settings.
•Rule controller: The rule controller is displayed to the right of the code editor, which allows managing and applying specific styles to selected elements. If no element is selected, no associated rules are displayed, but if an element is selected, custom styles can be added, modified, or deleted for that element.

Steps to change the style of an element
•Navigate to the CSS tab: Initially, the panel does not contain applied style rules.
•Selecting an element: When clicking on an element within the modeling area, its ID is displayed in the interface. In the Style Rule Controller section, the option "+ Add style rule" is displayed.
•Add style rule: When this option is clicked, a CSS rule is automatically generated in the code editor, named according to the identifier of the selected element. Multiple rules can be created for each element.
•Edit the rule: Within the rule body, press "CTRL + spacebar" to invoke the wizard. Select the attribute and the value to be modified so as to customize the design as needed.
•Apply changes: Click on the button "Execute" from the editor to display the updates.


